Usage Documentation
Master API Calls with this comprehensive guide.
Goal
API Calls helps you exercise REST services without relying on a browser or external tools. It lets you craft HTTP requests, send them, inspect responses, and organise them into tabs, collections, and workspaces.
Requirements and Installation
- Official packages: download the latest release for Linux, macOS, or Windows from GitHub Releases.
- Arch Linux: available through the
api-calls-binpackage (AUR). - Running from source:
-
npm install -
npm run devto launch the application in development mode. -
npm run build:<platform>to generate installers (linux/mac/win).
-
First Run
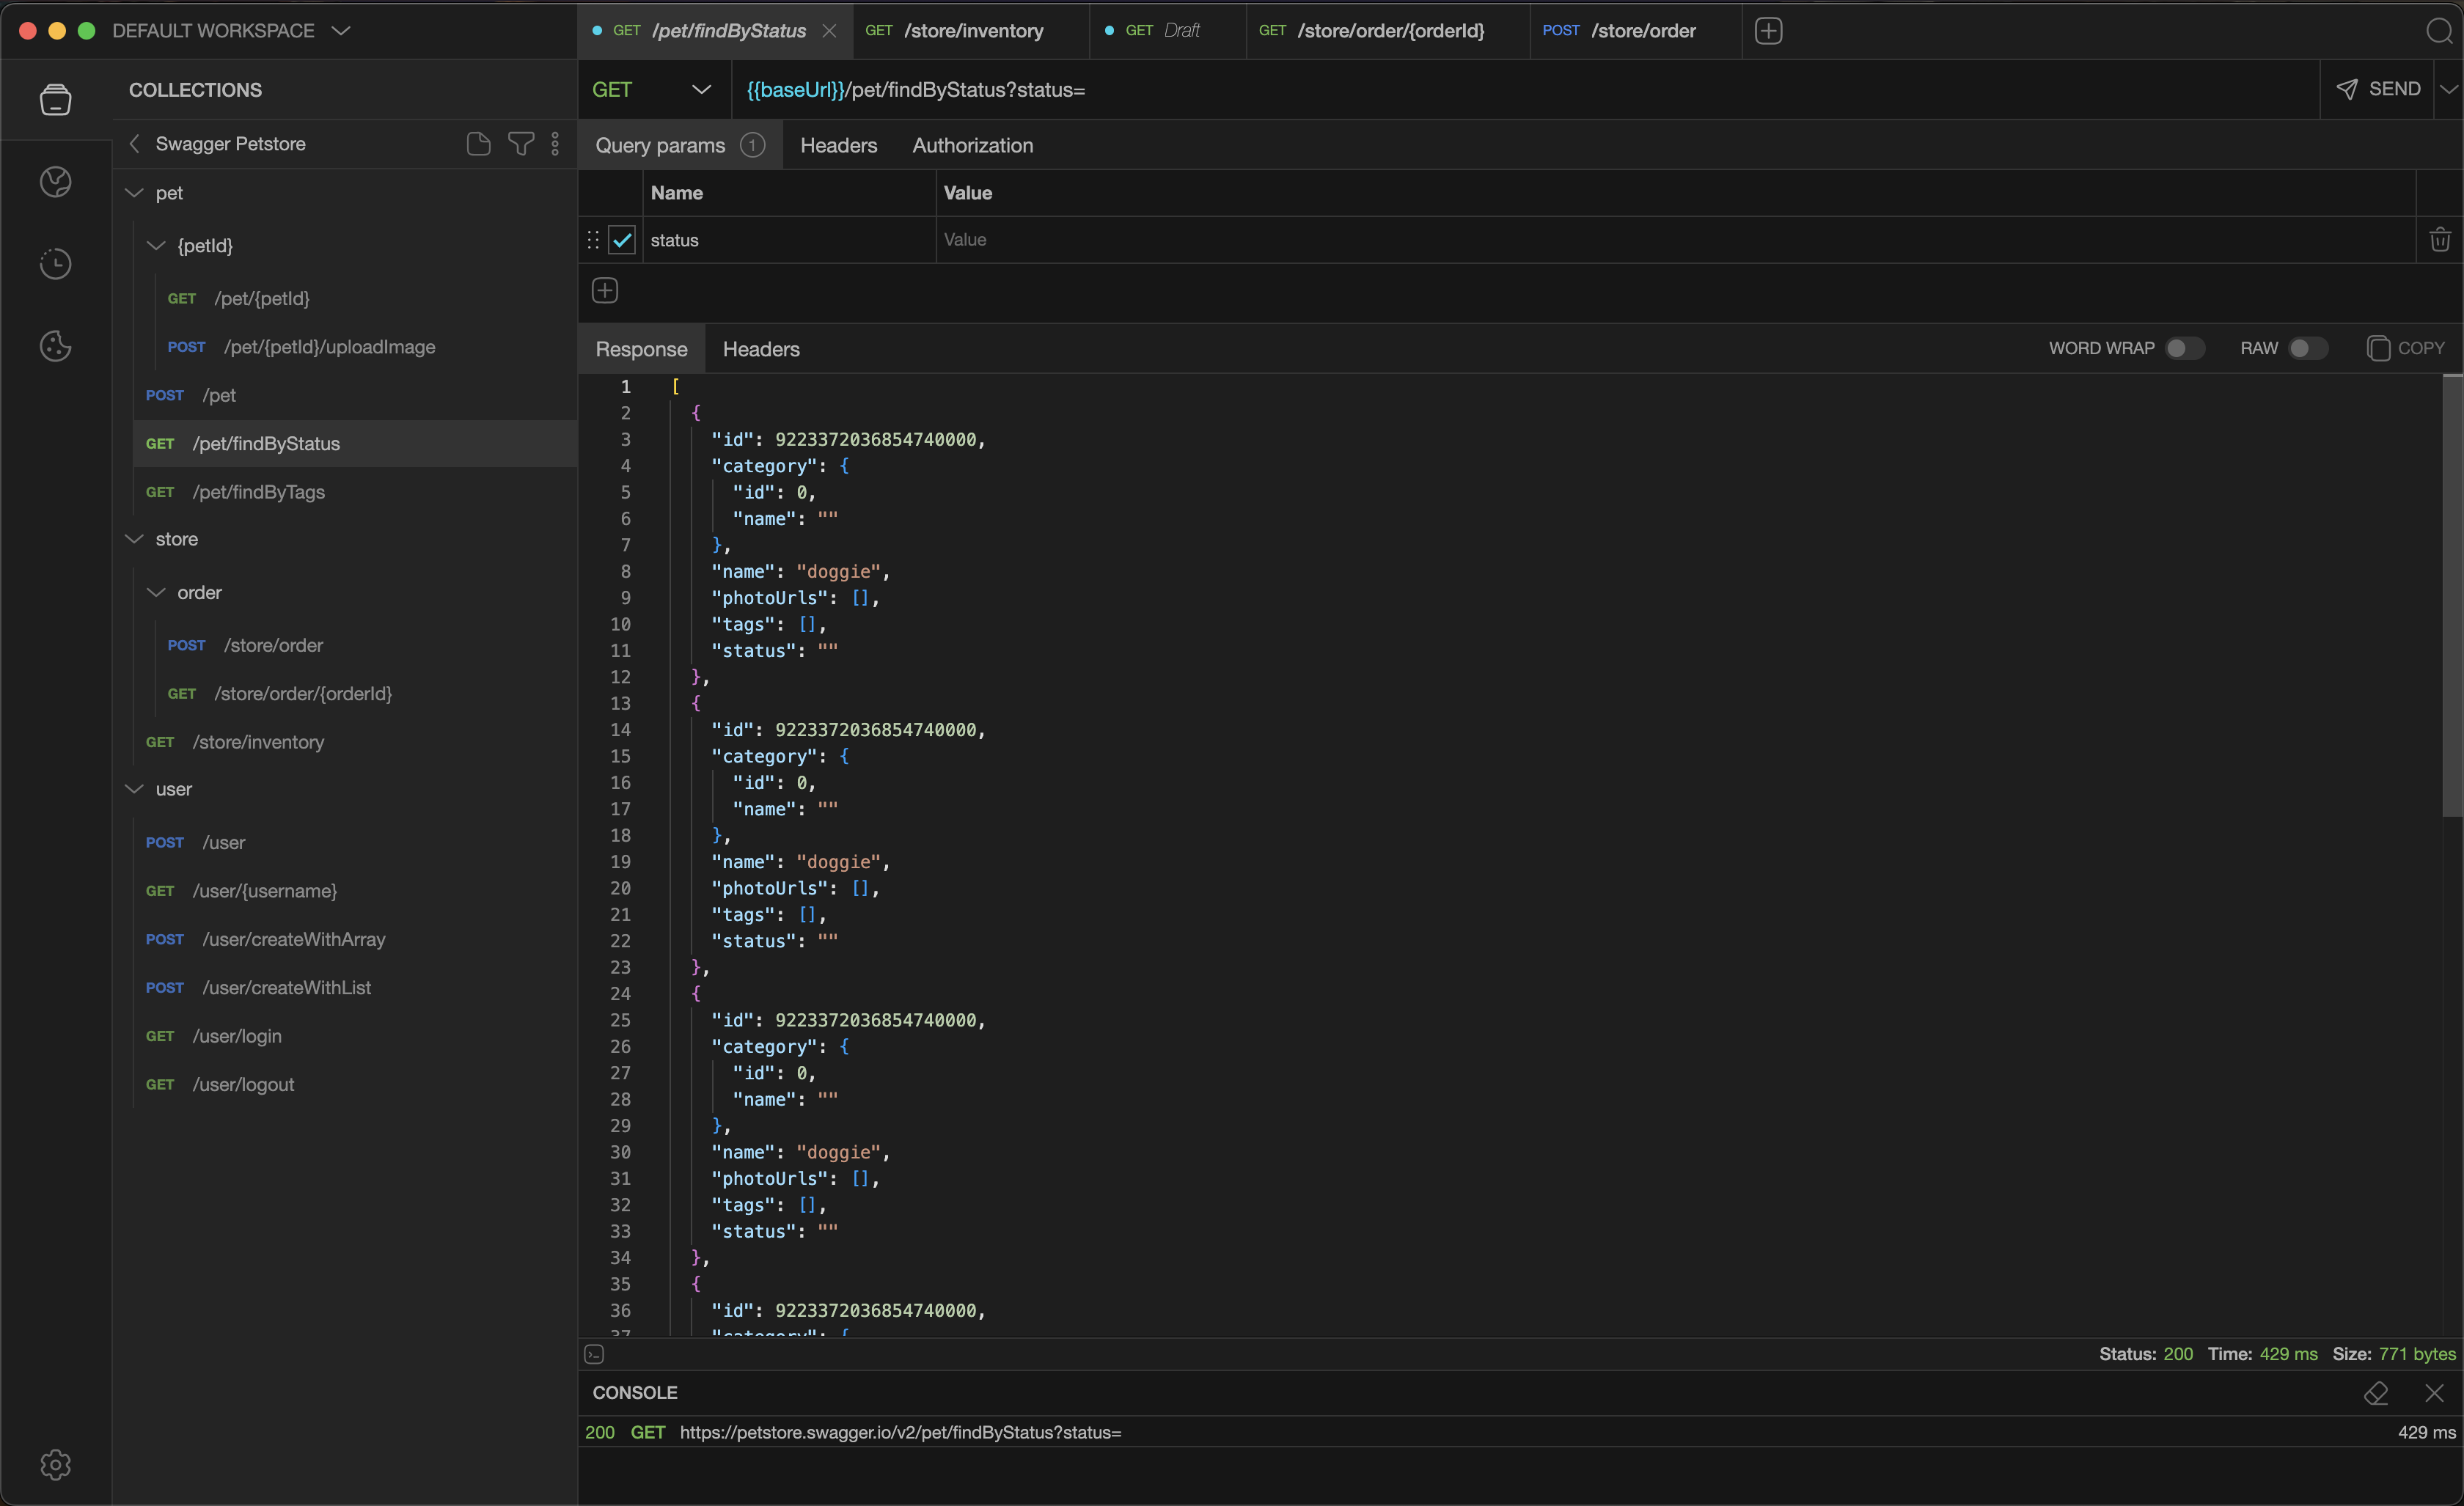
- On launch, the default workspace opens with the side menu collapsed.
-
Click New Tab (the
+icon orCtrl/Cmd+T) to prepare a new request. - Choose the HTTP method, enter the URL, and add the required parameters or body.
-
Press
Ctrl/Cmd+Enteror the Send button to execute the request. - Review the response at the bottom: status, duration, size, and body.
Interface at a Glance
- Optional top menu: quick access to actions,
view, tools, and updates (toggle from Settings or
Ctrl/Cmd+M). - Side menu: tabs for Collections, Environments, History, Cookies, and Settings (switch via shortcuts).
- Side panel: displays the content of the selected section (collection tree, environments, etc.).
- Central tabs: request editor, header/body configuration, and response viewer. Tabs support drag-and-drop reordering.
- Bottom console: log of sent requests and debugging messages.
Building and Sending Requests
- Method and URL: use the selectors for GET, POST, PUT, PATCH, DELETE, and more. You can also define custom methods for non-standard HTTP verbs. URLs auto-complete with environment variables when selected.
- Query parameters: add rows in the Params section.
- Path parameters: define dynamic URL segments using
:paramNamesyntax (e.g.,/users/:id/posts/:postId). Values can be set in the Path section. - Headers: add request headers. They will overwrite collection headers.
- Body: choose the mode (JSON, YAML, text, form-data, x-www-form-urlencoded, file). The Monaco-based editor offers syntax highlighting.
- Authentication: configure authentication from the Auth tab:
- Bearer Token: adds an Authorization header with your token.
- Basic Auth: encodes username and password in the Authorization header.
- OAuth 2.0: supports the Authorization Code flow. Configure your client ID, client secret, authorization URL, and token URL. The app opens an integrated browser window to complete the OAuth flow and automatically retrieves the access token.
- Custom Token: add any custom header for authentication.
- Environment: assign variables via Environment (collections can specify a preferred environment).
- Send and cancel:
Ctrl/Cmd+Entersends the request,Esccancels it.
Scripting
You can write JavaScript code to execute before a request is sent (Pre-request Script) or after a response is received (Post-request Script). Scripts run in a secure sandbox with a 60-second timeout limit.
Available Resources
- console: Use
console.log(message)orconsole.error(message). Output appears in the bottom console. - environment: access and modify environment variables.
-
environment.get(key)- retrieve a variable value -
environment.set(key, value)- set or update a variable -
environment.unset(key)- remove a variable
-
- http: Make asynchronous HTTP requests directly from your script.
-
await http.get(url, headers) -
await http.post(url, body, headers) -
await http.put(url, body, headers) -
await http.delete(url, headers) -
await http.request(method, url, body, headers)- for any HTTP method
-
- request: Access the current request details (method, URL, body, headers, queryParams).
- response (Post-script only): Access the received response (status, headers, body, rawBody).
Script Examples
Pre-request: Generate authentication token
// Fetch a token before sending the request
const res = await http.post('https://api.example.com/auth', {
  username: environment.get('user'),
  password: environment.get('pass')
});
environment.set('token', res.body.access_token);
console.log('Token refreshed');
Post-request: Validate response
// Check response status and extract data
if (response.status === 200) {
  const data = JSON.parse(response.body);
  environment.set('userId', data.id);
  console.log('User ID saved:', data.id);
} else {
  console.error('Request failed:', response.status);
}
Managing Tabs
- Duplicate: right-click a tab and choose Duplicate tab.
- Restore:
Ctrl/Cmd+Shift+Treopens the last closed tab. - Move: drag tabs to reorder them.
- Search: open the tab switcher with
Ctrl/Cmd+Oto find a tab by name. - Close:
Ctrl/Cmd+Wcloses the active tab. - Bulk close: right-click for Close others or Close all.
- Save a request:
Ctrl/Cmd+Ssaves to the linked collection.
Collections
- Create folders and sub-folders to group related requests.
- Assigning an environment to a collection propagates default variables to linked tabs.
- Use Pre-request Script and Post-request Script at the collection level to run JavaScript for all requests in the collection.
- Define collection headers that will be sent on all requests within the collection.
- Import and export from the context menu:
- Postman v2.1.0: full compatibility with Postman collections.
- OpenAPI 3.0.1: import API specifications and export your collections.
- JSON/YAML: custom API Calls format for backup and sharing.
- cURL: import cURL commands directly or export requests as cURL commands for sharing or terminal use.
Environments and Variables
-
Define environments (dev, staging, prod) with key/value pairs.
-
Insert variables as
{{variable}}in URLs, headers, or bodies. - Define environment headers that will be sent on requests.
-
Insert variables as
- Duplicate, reorder, or export complete environments as needed.
- Pick the active environment per tab from the request toolbar.
Header Priority
Headers can be defined at multiple levels. When the same header is defined in different places, higher priority levels override lower ones:
- Default headers (Settings) - lowest priority
- Workspace headers
- Environment headers
- Collection headers
- Request headers - highest priority
For example, if you set Content-Type: application/xml at the collection level but Content-Type: application/json at the request level, the request will use application/json.
Workspaces
- Separate collections, environments, tabs, and cookies per project.
- Access the list and workspace actions from the side menu.
- Create, duplicate, rename, and remove workspaces. Each workspace is stored in its own file.
Settings
- Appearance:
- Theme selection (Auto, Light, Dark, High Contrast, or custom themes).
- Window mode: choose between custom or native title bar (Linux/Windows).
- Request view orientation: horizontal or vertical layout.
- Behavior:
- Menu visibility toggle.
- Auto-scroll to active tab.
- Notifications and confirmation prompts.
- Save last response toggle.
- Network:
- Request timeout: default is 30 seconds, adjust for slow APIs.
- Follow redirects: automatically follow HTTP redirects.
- Reject unauthorized: disable to allow self-signed SSL certificates (useful for local development).
- Proxy configuration: route requests through an HTTP/HTTPS proxy for debugging or accessing internal networks.
- Default headers: define headers that apply automatically to all requests (lowest priority in the header hierarchy).
Auto Updates (Beta)
- On macOS and Windows, the app checks for updates in the background.
- On Linux, install new versions manually.
Essential Shortcuts
Tabs
-
Ctrl/Cmd+T- New tab -
Ctrl/Cmd+W- Close tab -
Ctrl+Tab- Next tab -
Ctrl+Shift+Tab- Previous tab -
Ctrl/Cmd+Shift+T- Restore tab -
Ctrl/Cmd+O- Find tab
Requests
-
Ctrl/Cmd+Enter- Send request -
Ctrl/Cmd+S- Save request -
Ctrl/Cmd+Shift+S- Save as -
Esc- Cancel request
Navigation
-
Ctrl/Cmd+B- Toggle sidebar -
Ctrl/Cmd+L- Collections -
Ctrl/Cmd+E- Environments -
Ctrl/Cmd+H- History -
Ctrl/Cmd+G- Cookies -
Ctrl/Cmd+,- Settings -
Ctrl/Cmd+M- Toggle menu -
Ctrl/Cmd+Shift+C- Toggle console
Tips and Troubleshooting
- If an HTTPS call fails, temporarily disable Reject unauthorized in Settings.
- Check the bottom console for validation messages.
- Use Restore tab to recover accidentally closed tabs.
Where Data Lives
Collections, environments, tabs, and cookies are stored per workspace under Electron's user data directory.
No telemetry: API Calls does not collect or send any data to external servers. All your data stays on your machine.
Additional Resources
- GitHub repository
- Issues: use Help > Submit bug or open a GitHub ticket.